The problem with an active mind is you think a lot.
The problem with a curios mind is that you wonder a lot.
The problem with both is that you wonder if you could do something.
The problem with being a geek is, well, you actually start clicking until you’re done even half-assed.
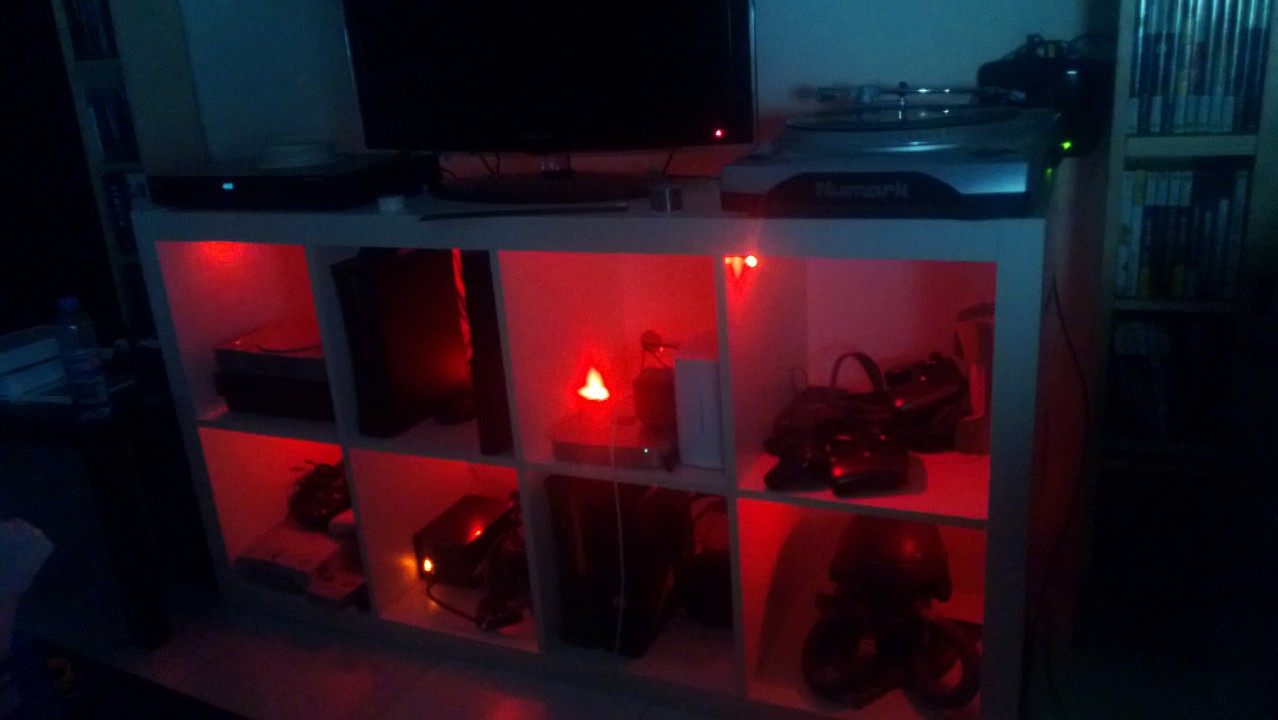
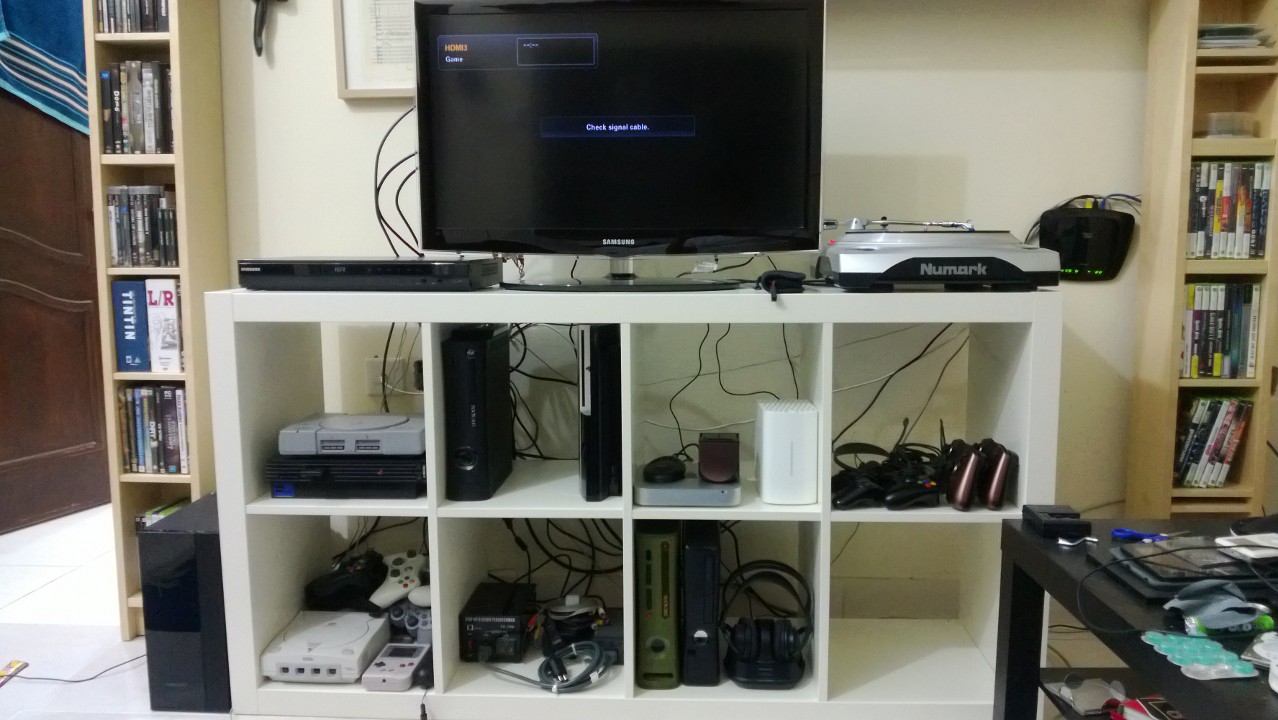
It all started with staring at the bookshelf I got from IKEA which I turned to a TV stand which looked like this:
Then I thought:
Wait a minute! Wouldn’t it be cool if the boxes changes colors?
And so it begins.
Here’s how I started talking to myself about it:
Me: Why colors? Just simple lights should do it
Me: But colors!! And you can do it!
Me: Alright. But what about the ugly wires in the back?
Me: Cover them with a sheet, for got sake. Even a sheet of cloth could do.
Me: Hmmmm… I got better; Acrylic board. But I’ll have to cut it in boxes. Drilling a whole board can be an issue.
Me: Alright. We’re on!
Me: But that’s it? Color changing boxes?
Me: Yes, got any other idea?
Me: Yes! Twitter and Instagram notifications!
Me: Let’s get to it!
So I bought an acrylic board, cut it to eight 35cm x 35cm. The back looked from this to this:
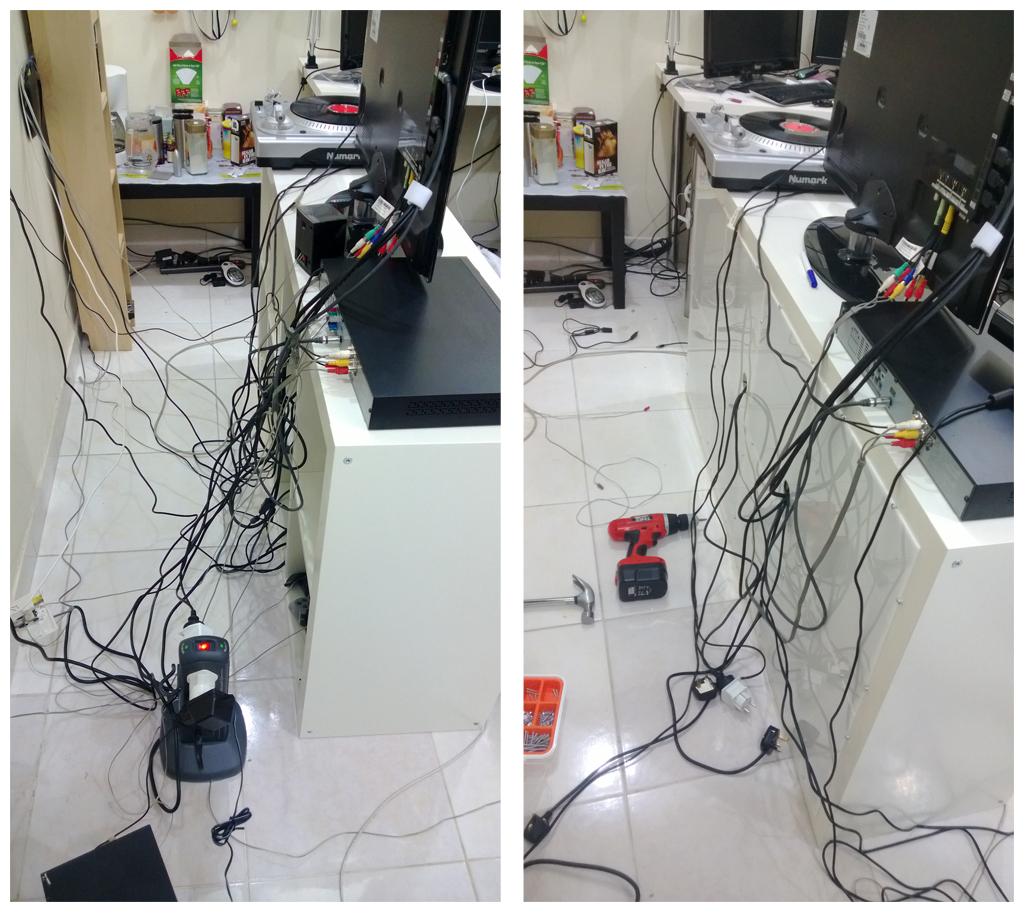
Here’s how I fit the boards in the background:

I burned my foot with the soldering gun in the process:

I’m such an idiot. It fell on my foot. So instead of quickly removing it or pulling my foot, I paused to process whats going on THEN KICKED IT!!! I KICKED IT!!! BRAIN, WTF ARE YOU DOING!?
But in all honesty, worth all the trouble. Here’s the result (Although for some reason the Red and Green colors [And their combinations] are hard to pick up *sob*):
Alright, so since they’re a bunch of LEDs. Each LED has 4 pins (Red, Green, Blue, Ground [The ground is the longest pin]), I decided to use phone wires because they’re made of 4 wires:
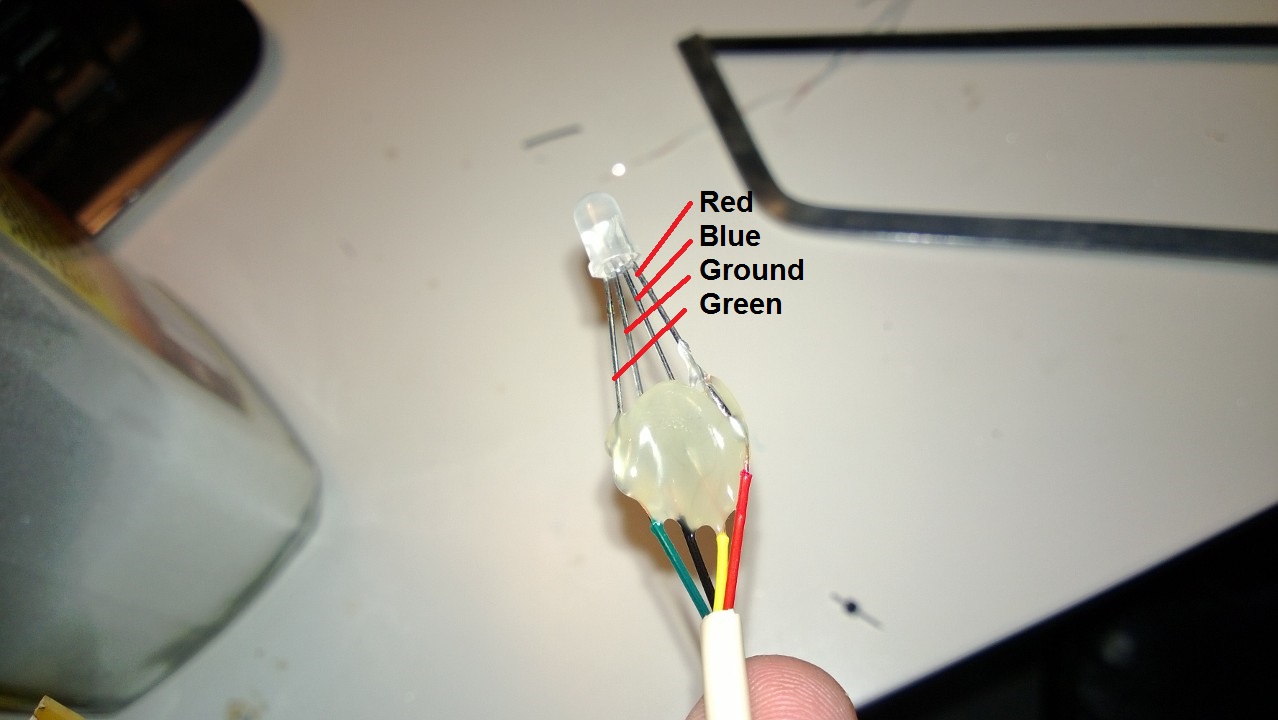
Then connect them according to this picture (Red in 3, Green in 5, Blue in 6, Ground on whatever ground pin):

The reason I used hot glue is that, well, I’m bad at soldering and I tend to make enough exposed ends that they’d short out. So hot glue to prevent that (And I like playing with it).
Next I need to do is attach an Ethernet Shield and make it notify me when there’s a new tweet or instagram update!
Anyway, here’s the Arduino code.
int redPin = 5;
int greenPin = 3;
int bluePin = 6;
void setup()
{
  pinMode(redPin, OUTPUT);
  pinMode(greenPin, OUTPUT);
  pinMode(bluePin, OUTPUT);
  Serial.begin(9600);
}

void loop()
{
  int x=0;
  int y=0;
  int z=0;
  for (x=0;x<255;x++)
  {
    setColor(x,y,z);
    delay(10);
  }

  for (y=0;y<255;y++)
  {
    setColor(x,y,z);
    x--;
    delay(30);
  }
  for (z=0;z<255;z++)
  {
    setColor(x,y,z);
    y--;
    delay(30);
  }

  for (x=0;x<255;x++)
  {
    y = x;
    setColor(x,y,z);
    z--;
    delay(10);
  }
  for (y=0;y<255;y++)
  {
    setColor(x,y,z);
    x--;
    delay(30);
  }
  for (z=0;z<255;z++)
  {
    x = z;
    setColor(x,y,z);
    y--;
    delay(30);
  }


  for (y=0;y<255;y++)
  {
    setColor(x,y,z);
    delay(10);
  }
  for (x=255;x>0;x--)
  {
    setColor(x,x,x);
    delay(10);
  }
  Serial.println("=====");
}

void setColor(int red, int green, int blue)
{
  analogWrite(redPin, red);
  analogWrite(greenPin, green);
  analogWrite(bluePin, blue);
  Serial.print("Red: ");
  Serial.print(red);
  Serial.print(" | Green: ");
  Serial.print(green);
  Serial.print(" | Blue: ");
  Serial.println(blue);
}
One thought on “Arduino + IKEA + RGB LEDs == this!”